
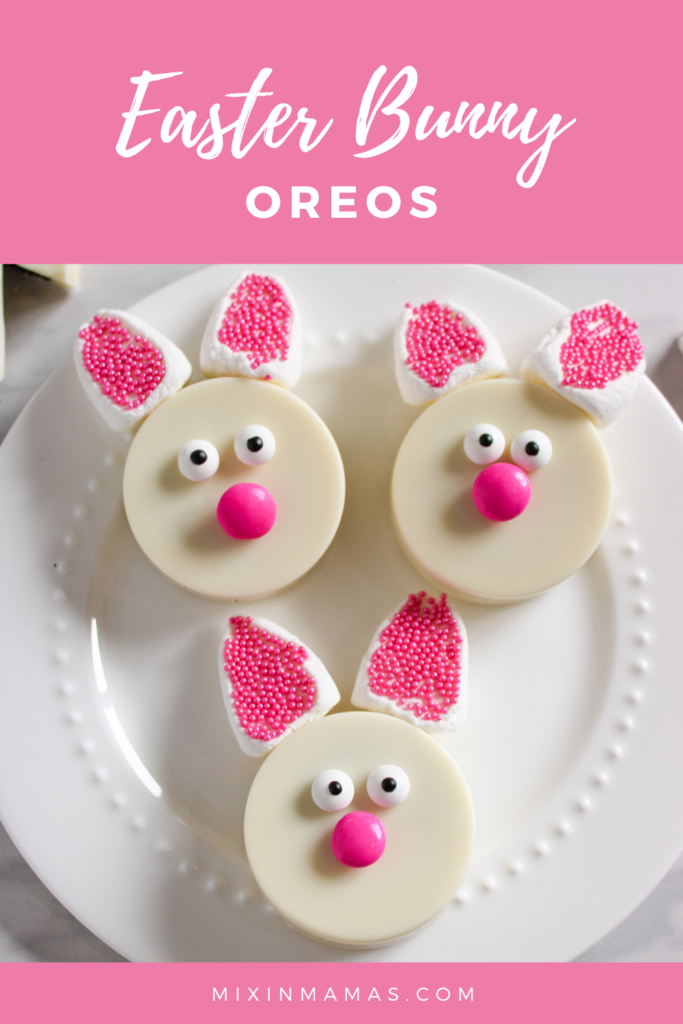
These Easter Bunny Oreos are an adorable treat for Easter! They are so simple to make and only require a few ingredients too. These cookies look so cute on a holiday platter when guests are coming over.
I like to use them as place favors at each person’s place at the Easter table or to pack them up in clear cellophane bags to send home with each guest. The only special equipment you need for making these is a silicone mold.
Easter Bunny Oreos Recipe
Prep: 15 minutes| Cool Time: 20 – 25 minutes | Total Time: 40 minutes
Makes: 6 chocolate bunny Oreos ( you can easily double this recipe)
Disclosure: Some of the links in the post below are affiliate links provided for your convenience. This means that if you purchase something through one of these links, we get a small commission at no added cost to you.

Ingredients:
12 oz of white candy melts
6 Oreos
6 full size marshmallows
Pink sprinkles
6 pink M & Ms
12 Candy eyes
Directions:
Add candy melts to microwave safe bowl. Follow the directions on your candy melts bag for melting until chocolate is smooth, thin and glossy.
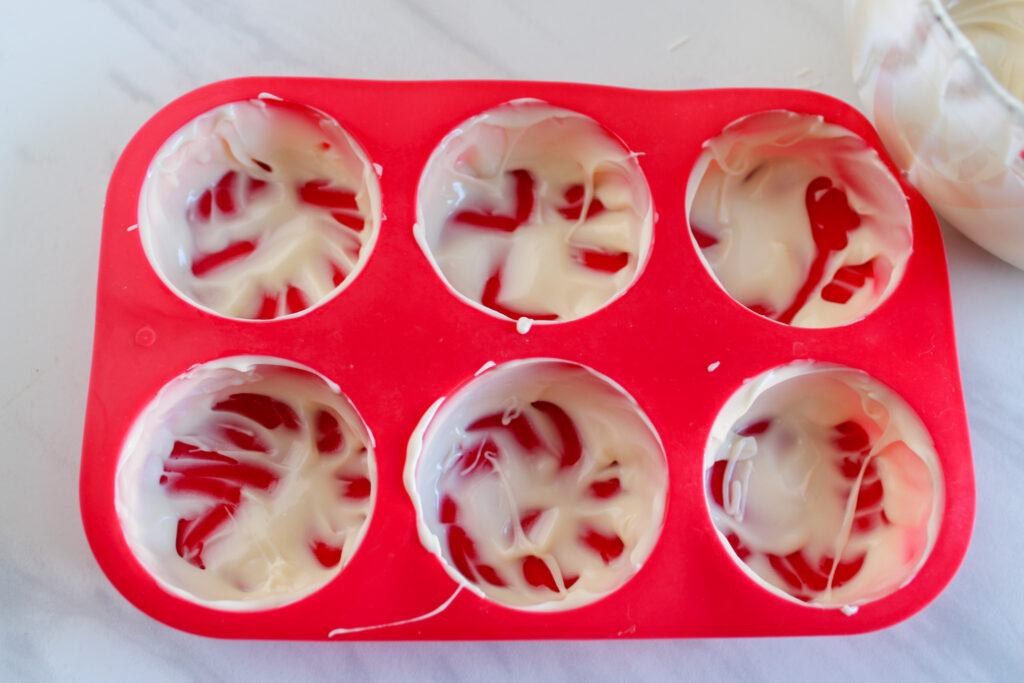
Place approximately 1 tbsp of melted chocolate into each mold and use the back of a spoon to coat the sides.
After all sides are coated in each mold, pick up mold and tap on the surface until chocolate runs down the sides and fully coats the bottom.
Place molds in the refrigerator to harden for 5 minutes.

Remove molds and place Oreo in the middle of each cup.
Pour remaining melted chocolate into each mold.
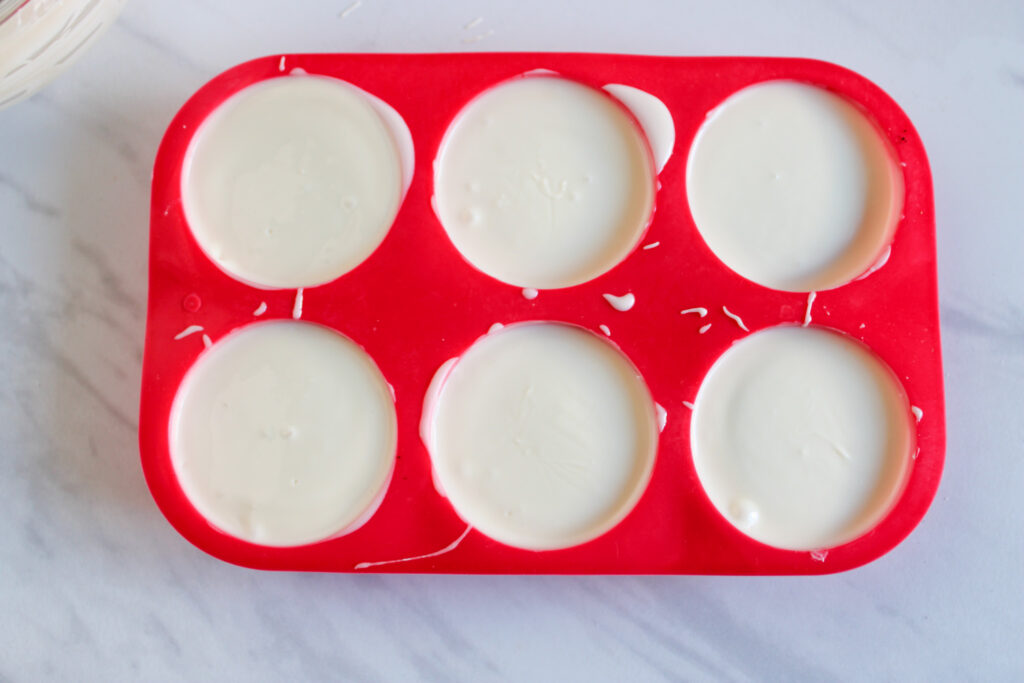
Pick up the mold and tap again until the chocolate appears to have coated the space between the cookie and the sides of the mold and evenly covered the top. Continue to tap on the counter until all air bubbles are gone.
Place back in the refrigerator for approximately 15 – 20 minutes or until the chocolate has fully hardened.
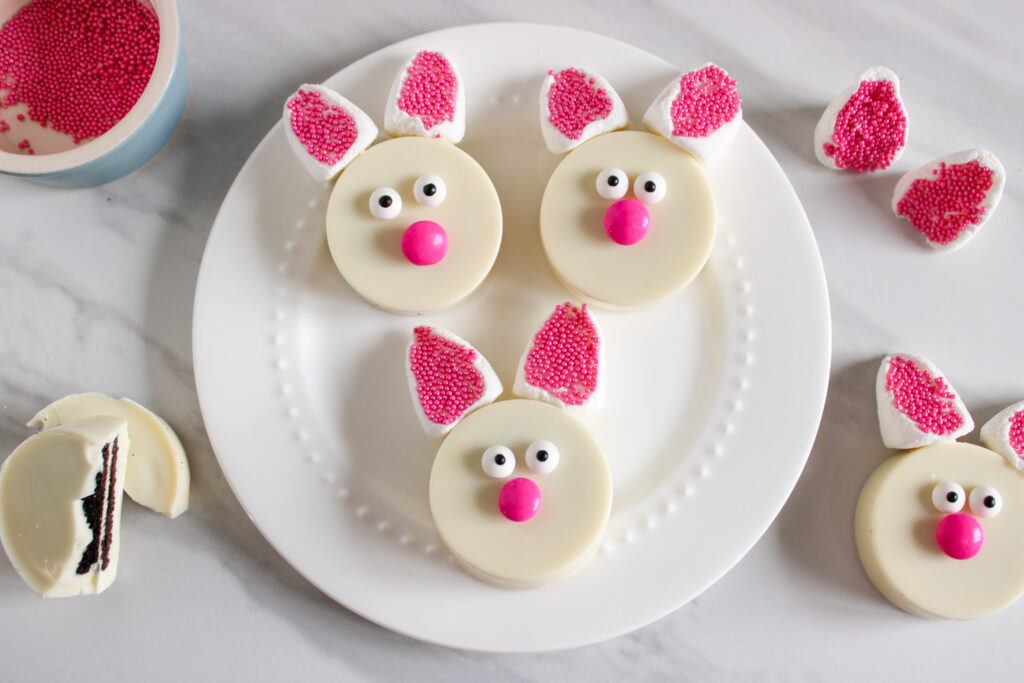
Remove cookies from each mold.
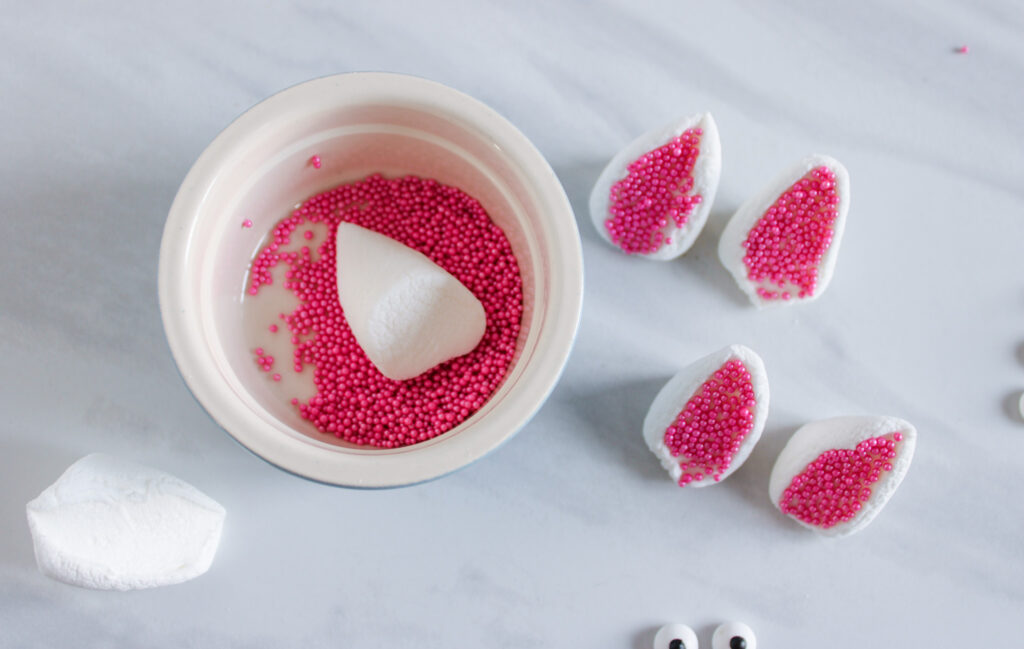
To make the ears, cut each marshmallow diagonally. Dip the sticky side into the sprinkles.

Re-melt any chocolate left in the bowl and place a small amount on the bottom of the marshmallow ears, candy eyes and m & m and stick to the oreo to create the bunny face.
***When removing from the mold, if the outside of the cookie bottom isn’t completely even, brush the outside cookie edge along the palm of your hand to break off any excess chocolate.

Easter Bunny Oreos Recipe
Equipment
- Silicone oreo molds (Amazon link below)
Ingredients
- 12 oz white candy melts
- 6 Oreos
- 6 full size marshmallows
- Pink sprinkles
- 6 pink M & Ms
- Candy eyes
Instructions
- Add candy melts to microwave safe bowl. Follow the directions on your candy melts bag for melting until chocolate is smooth, thin and glossy.
- Place approximately 1 Tbsp of melted chocolate into each mold and use the back of a spoon to coat the sides.
- After all sides are coated in each mold, pick up mold and tap on the surface until chocolate runs down the sides and fully coats the bottom.
- Place molds in the refrigerator to harden for 5 minutes.
- Remove molds and place oreo in the middle of each cup.
- Pour remaining melted chocolate into each mold.
- Pick up the mold and tap again until the chocolate appears to have coated the space between the cookie and the sides of the mold and evenly covered the top. Continue to tap on the counter until all air bubbles are gone.
- Place back in the refrigerator for approximately 15 – 20 minutes or until the chocolate has fully hardened.
- Remove cookies from each mold.
- To make the ears, cut each marshmallow diagonally. Dip the sticky side into the sprinkles.
- Re-melt any chocolate left in the bowl and place a small amount on the bottom of the marshmallow ears, candy eyes and m & m and stick to the oreo to create the bunny face.
Leave a Reply